Phone Photography Settings
The best camera is the one you have with you, and for most travelers, that is a phone. Modern smartphone cameras are capable of producing genuinely stunning images when you understand a few core principles and use features that most people never explore beyond the default auto mode.
These 15 techniques cover composition, lighting, camera settings, editing, and the practical realities of shooting while traveling. Each one is specific and immediately actionable.
✨ Quick Summary: 15 phone photography techniques for travelers — from composition rules and golden hour timing to editing apps and hidden camera settings — each immediately actionable with no extra gear required.
1. Apply the Rule of Thirds Deliberately
The rule of thirds is the most fundamental composition tool in photography. Enable the grid overlay in your camera settings (both iPhone and Android have this option), and you will see two horizontal and two vertical lines dividing your frame into nine equal sections.
Place your main subject on one of the four intersection points where the lines cross. For landscapes, put the horizon on the top or bottom third line rather than dead center. For portraits and street scenes, position the person’s eyes along the upper third line.
This creates visual tension and balance that centered compositions lack. The rule of thirds transforms snapshots into photographs.
How to enable it: On iPhone, go to Settings, then Camera, then toggle on Grid. On Android, open Camera, tap Settings, and enable Grid Lines or Guidelines.
2. Master Golden Hour Timing
Golden hour produces the most flattering natural light available, and it happens twice every day. The warm, directional, low-angle sunlight during this window makes colors richer, adds depth through long shadows, and softens harsh features on faces.
Golden Hour Times by Season (approximate)
| Season | Morning Golden Hour | Evening Golden Hour |
|---|---|---|
| Summer | 5:30-6:30 AM | 7:30-8:30 PM |
| Spring/Fall | 6:30-7:30 AM | 6:00-7:00 PM |
| Winter | 7:30-8:30 AM | 4:00-5:00 PM |
These times vary by latitude. Closer to the equator, golden hour is shorter but occurs at more consistent times year-round. In northern latitudes during summer, golden hour can last over an hour. Use the app “Golden Hour One” or search “golden hour [your location]” to get exact daily times.
The practical application: Schedule your most important photo stops for golden hour. Visit that famous landmark, scenic viewpoint, or photogenic street in the early morning or late afternoon instead of midday.
3. Use Leading Lines to Pull Viewers In
Leading lines are elements in a scene that guide the viewer’s eye toward your subject or deeper into the image. They create depth and dimension in a flat photograph.
Common leading lines while traveling:
- Roads and pathways stretching toward a vanishing point
- Train tracks, bridges, and tunnels
- Rivers, shorelines, and fence lines
- Rows of columns, arches, or lampposts in architectural settings
- Stairways leading upward toward a subject
Position yourself so the leading line starts from a corner or edge of your frame and moves toward your subject. A cobblestone street in an old European town, a wooden pier stretching into a lake, or a winding mountain road all serve as natural leading lines.
4. Find Reflections Everywhere
Reflections double the visual impact of a scene and add a layer of artistic quality that elevates a simple photo. You do not need a pristine mountain lake to use this technique.
Where to find reflections while traveling:
- Puddles after rain (get low to maximize the reflection area)
- Shop windows and glass facades
- Marble floors in museums and temples
- Car roofs and hoods (especially dark-colored vehicles)
- Still sections of rivers and canals in early morning before wind picks up
- Sunglasses lenses held close to the camera
Get your phone as close to the reflective surface as possible. The lower your angle, the more of the reflection fills your frame. Flip the photo upside down and the reflection becomes the primary image — a disorienting and eye-catching effect.
5. Add Foreground Interest to Landscapes
The most common mistake in landscape photography is shooting a beautiful view with nothing in the foreground. The result looks flat and fails to capture the sense of depth and scale you felt standing there.
Fix this by including foreground elements:
- Flowers, rocks, or fallen leaves in the bottom third of the frame
- A person (yourself or a travel companion) looking out at the scene
- Local objects like a fishing boat, market stall, or cafe table
- Architectural details like a stone wall, railing, or archway that frames the view
This creates three distinct layers in your image — foreground, middle ground, and background — which produces the depth that draws viewers into the photo.
💡 Pro Tip: Golden hour (30-60 minutes after sunrise or before sunset) is the single biggest factor in making ordinary scenes look extraordinary. Schedule your most important photo stops for these windows.
6. Use Portrait Mode for Food Photography
Portrait mode is not just for people. The shallow depth-of-field effect (blurred background with a sharp subject) works beautifully for food photography, isolating your plate against a soft, non-distracting background.
Food photography tips:
- Shoot from a 45-degree angle for plated dishes
- Shoot directly overhead for flat items like pizza, salads, or charcuterie boards
- Use natural light from a window — turn off the flash entirely
- Portrait mode at a distance of 1.5-3 feet produces the most natural blur
- Include hands, utensils, or the table setting for context and warmth
- If the restaurant is dark, increase exposure manually by tapping the screen and swiping up
7. Shoot Burst Mode for Action and Movement
Burst mode captures 10 frames per second, dramatically increasing your chances of getting the perfect moment. Use it for any scene involving movement.
When to use burst mode:
- Street performers and musicians
- Markets with people moving through the scene
- Waves crashing on rocks or shorelines
- Birds taking flight
- Someone jumping at a scenic viewpoint
- Any candid moment with people
How to activate: On iPhone, swipe the shutter button to the left and hold. On most Android phones, press and hold the shutter button. Review the burst and select the sharpest frame with the best expression or composition.
8. Know When HDR Helps and When It Hurts
HDR (High Dynamic Range) combines multiple exposures to balance bright and dark areas in a single image. It excels in high-contrast scenes but can produce unnatural results when used incorrectly.
Use HDR for: Landscapes with bright sky and dark foreground, interior shots with windows, shaded areas next to sunlit areas, architectural photography in mixed lighting.
Avoid HDR for: Moving subjects (it causes ghosting), scenes with already balanced lighting, and intentionally moody or dramatic lighting where you want deep shadows.
Most modern phones apply Smart HDR or Auto HDR automatically. To take control, turn off automatic HDR in your camera settings and toggle it manually when you encounter high-contrast scenes.
9. Night Mode: More Than Just Dark Photos
Night mode uses long exposures and computational processing to brighten dark scenes without flash. The technology has improved dramatically and now produces images that were impossible with phones just a few years ago.
Night mode tips:
- Brace your phone against a solid surface — a wall, table, railing, or your own body. The longer the exposure, the more critical stability becomes.
- Do not move during the capture. Night mode exposures can last 1-10 seconds depending on ambient light.
- Avoid scenes with fast-moving subjects. People walking will appear as blurry ghosts.
- Night mode captures the ambiance of a scene (warm restaurant lighting, neon signs, candlelit streets) in ways that flash photography destroys.
- For city skylines and architecture at night, use a small tripod for sharp results at longer exposures.
10. Edit with the Right Apps
Shooting a good photo is half the process. Editing brings out the best in your images and creates a consistent visual style for your travel memories.
Recommended Editing Apps
Snapseed (Free, Google) — The best fully free editor. Key tools include Selective Adjust (edit brightness in specific areas), Healing (remove unwanted objects), and Tune Image (overall exposure, contrast, and saturation). No watermarks, no subscription.
Lightroom Mobile (Free with optional subscription) — Excellent for color grading and batch editing. The free tier includes powerful tools for exposure, color, and detail adjustments. The paid tier adds selective editing, healing, and cloud sync. Best for creating a consistent color palette across all your trip photos.
VSCO (Free with optional subscription) — Known for film-inspired presets that give photos an analog, editorial quality. The free presets are good. The paid library is extensive. VSCO tends to produce moodier, more artistic results than the other options.
Basic Editing Workflow
- Straighten the horizon if it is crooked (this is the most common fixable error)
- Adjust exposure — slightly brighter for daytime, preserve the mood for evening shots
- Add a small amount of contrast to make the image pop
- Adjust warmth — slightly warmer for golden hour and food, cooler for blue hour and ocean scenes
- Bump up saturation or vibrance by 10-15% (never more, or colors look artificial)
- Sharpen lightly for final clarity
- Crop to improve composition if needed
11. Avoid Tourist Angles at Landmarks
Every famous landmark has a default photograph that millions of visitors take from the same spot. The Eiffel Tower from Trocadero. The Taj Mahal from the reflecting pool. The Colosseum from the street.
Find different angles:
- Shoot from below looking up to emphasize scale and architectural detail
- Include a local street, shop, or tree to frame the landmark in its neighborhood context
- Shoot through a window, archway, or gap in a fence
- Visit at non-peak times when the scene is empty or the lighting is different
- Look for the landmark reflected in water, glass, or polished surfaces
- Turn around — sometimes the view facing away from the landmark is more interesting than the landmark itself
12. Practice Street Photography Ethics
Street photography is one of the most rewarding travel genres, capturing authentic moments of daily life. It also requires sensitivity and respect.
Guidelines:
- In most public places, photography is legally permitted, but legality and ethics are different things
- If someone notices you and looks uncomfortable, lower your camera and move on
- Ask permission for close-up portraits. A smile and a gesture toward your camera is universally understood
- Many people are happy to be photographed and will pose proudly. A genuine compliment afterward goes a long way
- Learn local customs. Some cultures and religions have specific objections to photography. Respect these always
- Never photograph children without a parent’s clear permission
- Sharing a photo on your phone screen with the person you photographed is a simple and meaningful gesture
13. Back Up Photos While Traveling
Losing a phone full of irreplaceable travel photos is devastating. Establish a backup routine from day one.
Backup strategies:
- Cloud auto-upload — Enable Google Photos or iCloud to automatically back up every photo when connected to Wi-Fi. Confirm this is working before your trip.
- Portable hard drive or SSD — For longer trips, transfer photos weekly to a compact portable drive using a USB-C adapter
- Email key photos to yourself — For the most important images, emailing them to yourself creates an additional backup on a different server
- Do not rely on a single backup method — If cloud upload fails due to poor Wi-Fi, you need a second option
Delete screenshots, failed shots, and duplicates daily to keep your storage manageable and your backup process fast.
⚠️ Important: Enable cloud auto-upload (Google Photos or iCloud) before your trip and confirm it is working. Losing a phone full of irreplaceable travel photos is devastating and entirely preventable.
14. Create a Photo Story, Not Just Isolated Shots
The difference between a forgettable photo collection and a compelling travel story is variety and intentionality. Think of your photos as telling a narrative about your day and your destination.
The travel photo story formula:
- Wide establishing shot — The cityscape, the landscape, the overview that sets the scene
- Medium scene shots — Streets, markets, restaurants, and buildings that show the environment
- Close-up details — Food, textures, signs, hands, flowers, architectural ornaments
- People and moments — Candid interactions, your own expressions, locals going about their day
- The unexpected — Humor, surprises, beautiful accidents, weather, and chaos
Shoot a mix of all five categories every day. When you review your trip photos later, you will have a rich visual story instead of 200 variations of the same sunset.
15. Phone Camera Settings Most People Never Use
Your phone camera has powerful features buried in menus that most people never open.
Quick Reference: Settings for Different Scenarios
| Scenario | Key Setting | How to Adjust |
|---|---|---|
| Landscapes | HDR On, Wide lens | Switch to 0.5x for ultra-wide; tap sky to expose for clouds |
| Food | Portrait Mode, AE/AF Lock | Tap and hold on the dish to lock focus and exposure |
| Portraits | Portrait Mode, 2x zoom | 2x zoom produces more flattering facial proportions than wide |
| Night scenes | Night Mode, Stabilize | Brace against a surface; let phone choose exposure length |
| Action/Movement | Burst Mode, 1x lens | Swipe shutter left (iPhone) or hold shutter (Android) |
| Architecture | Wide lens, Grid on | Use 0.5x for interiors; align grid lines with building edges |
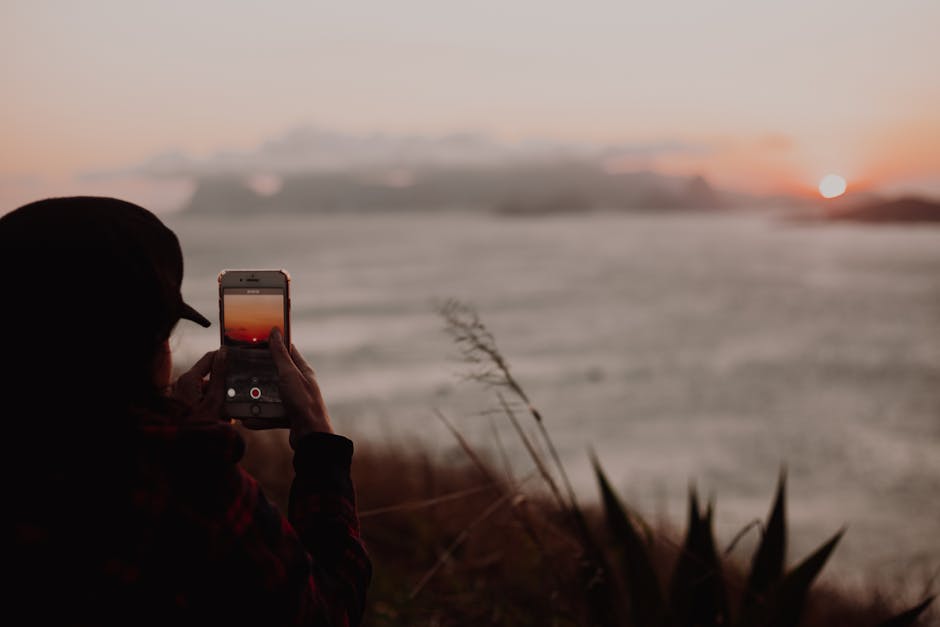
| Sunset/Sunrise | Tap dark area, reduce exposure | Tap the sky and swipe down slightly to preserve colors |
Hidden Features Worth Knowing
- AE/AF Lock — Tap and hold on your subject to lock both auto-exposure and auto-focus. The screen shows “AE/AF LOCK.” Now you can recompose your shot without the phone refocusing or readjusting brightness.
- Exposure compensation — After tapping to focus, swipe up or down (iPhone) or use the brightness slider (Android) to manually brighten or darken the image before shooting.
- RAW/ProRAW format — Available on newer phones under camera settings. RAW files capture more color and exposure data than JPEG, giving you much more editing flexibility in Lightroom or Snapseed. Files are larger but worth it for important shots.
- Timer with burst — Set a 3 or 10-second timer for stable tripod shots or self-portraits. Some phones capture a burst during the timer countdown, giving you multiple frames to choose from.
- Live Photo / Motion Photo — These capture a short video clip around each photo. Useful because you can select a different frame after the fact if the primary capture caught someone blinking or a car passing through.
- Manual white balance — In Pro or Manual mode, adjust white balance to match the light source. Tungsten settings correct orange indoor lighting. Daylight settings maintain natural colors outdoors. Auto white balance handles most situations, but manual control fixes persistent color casts.
Putting It All Together
You do not need to apply all 15 techniques to every photo. Start with three: rule of thirds, golden hour timing, and basic editing. These three alone will transform your travel photos from phone snapshots to images you are genuinely proud to share.
As they become second nature, layer in leading lines, foreground interest, and the camera settings adjustments. Within a single trip, you will notice a dramatic improvement in the quality and variety of your images.
The phone in your pocket is a remarkably powerful camera. The difference between an ordinary photo and a compelling one is rarely about equipment. It is about seeing light, choosing your moment, and composing with intention.