Meal Prep Steps
Meal prep is the practice of planning, cooking, and portioning your meals ahead of time so that healthy food is ready to grab throughout the week. It saves time on busy weeknights, reduces impulse takeout orders, cuts grocery spending, and helps you eat more consistently.
✨ Quick Summary: A step-by-step beginner’s guide to meal prep covering menu planning, batch cooking strategy, food storage guidelines, a full weekly plan, and reheating tips — all in one Sunday session.
This guide covers everything a beginner needs to start meal prepping with confidence.
Step 1: Choose Your Prep Day
Most people prep on Sunday, which gives you meals ready for Monday through Thursday or Friday. Some prefer Saturday to keep Sunday free. The day matters less than consistency. Pick a day, block two to three hours, and treat it like an appointment.
If a full week feels overwhelming, start with prepping just lunches for the workweek. That is five meals, and you can expand from there once the habit sticks.
Morning prep vs. afternoon prep. Some people prefer to prep right after a morning grocery trip when ingredients are freshest. Others like an afternoon session after the weekend rush settles. Try both and see what fits your schedule.
Step 2: Plan Your Menu Using the Formula
Every balanced meal prep container follows the same basic formula:
Protein + Grain + Vegetable + Sauce or Seasoning
This formula keeps meals nutritionally balanced and prevents boredom because you can mix and match components throughout the week.
Protein options: Chicken breast, chicken thighs, ground turkey, ground beef, salmon, shrimp, tofu, hard-boiled eggs, canned tuna, black beans, chickpeas.
Grain options: White rice, brown rice, quinoa, farro, sweet potatoes, pasta, couscous, whole wheat wraps.
Vegetable options: Broccoli, green beans, bell peppers, zucchini, spinach, roasted carrots, cauliflower, snap peas, asparagus.
Sauce and seasoning options: Teriyaki sauce, pesto, salsa, lemon herb vinaigrette, curry sauce, tahini dressing, soy-ginger glaze, buffalo sauce.
The key is to cook two to three proteins, two grains, and three to four vegetables, then assemble different combinations throughout the week. Monday might be chicken with rice and broccoli in teriyaki. Tuesday could be the same chicken with quinoa and roasted peppers in pesto. Same base ingredients, different meals.
💡 Pro Tip: Cook 2-3 proteins, 2 grains, and 3-4 vegetables, then assemble different combinations throughout the week. Same base ingredients, different meals every day.
Step 3: Build Your Shopping List
Once your menu is set, write your shopping list organized by grocery store section. This prevents backtracking through aisles and keeps the trip under 30 minutes.
Shopping List Template
Proteins:
- Chicken breasts or thighs (2 pounds)
- Ground turkey or beef (1 pound)
- Eggs (1 dozen)
Grains and Starches:
- Rice (white or brown)
- Quinoa or pasta
- Sweet potatoes
Fresh Vegetables:
- Broccoli (2 heads)
- Bell peppers (3-4)
- Zucchini (2-3)
- Spinach (1 bag)
- Onions and garlic
Pantry and Sauces:
- Olive oil
- Soy sauce
- Preferred sauces or dressings
- Salt, pepper, and seasonings
Snacks and Extras:
- Nuts or trail mix
- Fresh fruit
- Yogurt
- Cheese sticks or hummus
Buy in bulk where it makes sense. A large bag of rice, a family pack of chicken, and a bulk container of oats cost less per serving than individual portions.
Step 4: Batch Cooking Strategy
The order you cook matters. Here is the most efficient sequence that keeps you moving without downtime.
Phase 1: Start the Oven and Grains (0-5 minutes)
Preheat your oven to 400°F. Start your rice cooker or put a pot of water on to boil for grains. These take the longest and require the least attention, so they run in the background while you handle everything else.
Put sweet potatoes in the oven if they are part of your plan. They take 40 to 45 minutes and need no supervision.
Phase 2: Season and Cook Proteins (5-25 minutes)
While grains cook, prepare your proteins. Season chicken breasts, form turkey meatballs, or marinate tofu. Use the stovetop for proteins that benefit from a sear (chicken thighs, ground meat) and sheet pans in the oven for hands-off cooking (chicken breasts, salmon).
If you are cooking two proteins, stagger them. Get chicken in the oven first, then start ground turkey on the stovetop while the chicken bakes.
Phase 3: Prepare Vegetables (15-30 minutes)
Chop all your vegetables while proteins are cooking. Roast heartier vegetables like broccoli, carrots, and bell peppers on a sheet pan. Steam or blanch quick-cooking vegetables like green beans, snap peas, or asparagus on the stovetop.
Raw vegetables for snacking (celery, cucumber, cherry tomatoes) just need washing and cutting. Store these separately from cooked vegetables.
Phase 4: Make Sauces and Extras (25-35 minutes)
While everything cools slightly, prepare sauces, hard-boil eggs, or portion out snacks. A simple lemon herb dressing takes two minutes: olive oil, lemon juice, minced garlic, salt, and dried herbs whisked together.
Phase 5: Assemble and Store (35-60 minutes)
Once everything has cooled to room temperature (important for food safety), portion meals into containers. Do not pack food while it is still steaming, as trapped moisture promotes bacterial growth.
Step 5: Proper Food Storage
How you store prepped food directly affects how long it stays safe and tasty.
Container Types
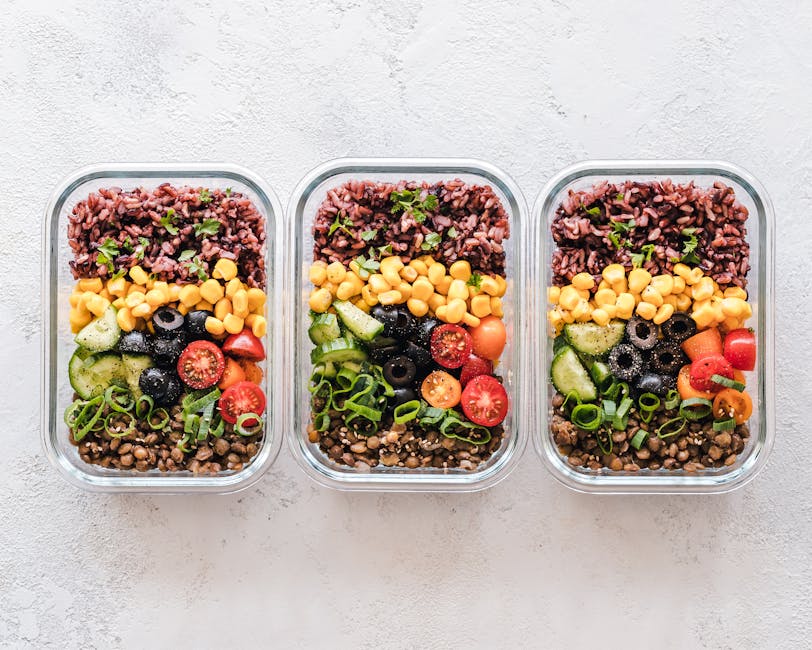
Glass containers with locking lids are the best overall choice. They are microwave safe, dishwasher safe, do not absorb odors or stains, and last for years. The upfront cost is higher but they pay for themselves quickly.
BPA-free plastic containers are lighter, cheaper, and less breakable. They work well but can stain from tomato-based sauces and may absorb odors over time.
Mason jars are excellent for soups, overnight oats, salads, and sauces. The glass is durable and the lids seal tightly.
Freezer bags work for anything going into the freezer. Remove as much air as possible before sealing to prevent freezer burn.
Fridge vs. Freezer Guidelines
Store meals you will eat within three to four days in the refrigerator. Anything beyond that should go straight into the freezer.
Labeling is essential. Write the contents and date on every container or bag. It takes five seconds and eliminates the guessing game later in the week.
Food Storage Times Table
| Food Item | Refrigerator (40°F or below) | Freezer (0°F or below) |
|---|---|---|
| Cooked chicken | 3-4 days | 2-3 months |
| Cooked ground meat | 3-4 days | 2-3 months |
| Cooked fish or shrimp | 2-3 days | 2-3 months |
| Hard-boiled eggs | 7 days | Not recommended |
| Cooked rice | 4-6 days | Up to 6 months |
| Cooked quinoa | 5-7 days | Up to 6 months |
| Cooked pasta | 3-5 days | Up to 2 months |
| Roasted vegetables | 3-5 days | Up to 3 months |
| Raw cut vegetables | 5-7 days | Varies by type |
| Soups and stews | 3-4 days | 2-3 months |
| Cooked beans | 3-5 days | Up to 6 months |
| Sauces and dressings | 5-7 days | Up to 3 months |
Sample Weekly Meal Prep Plan
Here is a complete week of meals built from one Sunday prep session. This plan uses two proteins (chicken and ground turkey), two grains (rice and quinoa), and four vegetables (broccoli, bell peppers, sweet potatoes, and spinach).
Prep List
- 2 pounds chicken breast (baked and sliced)
- 1 pound ground turkey (cooked with taco seasoning)
- 3 cups rice (cooked)
- 2 cups quinoa (cooked)
- 2 heads broccoli (roasted)
- 3 bell peppers (roasted)
- 3 sweet potatoes (baked)
- 1 bag spinach (washed, stored raw)
- 12 hard-boiled eggs
- 1 batch overnight oats (5 jars)
- 1 batch lemon herb dressing
Daily Breakdown
Monday
- Breakfast: Overnight oats with banana and peanut butter
- Lunch: Chicken with rice, roasted broccoli, and lemon herb dressing
- Dinner: Turkey taco bowl with quinoa, bell peppers, salsa, and shredded cheese
- Snack: Hard-boiled egg and an apple
Tuesday
- Breakfast: Overnight oats with berries and honey
- Lunch: Turkey taco lettuce wraps with quinoa and bell peppers
- Dinner: Chicken with sweet potato and spinach salad
- Snack: Hummus with carrot sticks
Wednesday
- Breakfast: Overnight oats with cinnamon and almonds
- Lunch: Chicken and quinoa bowl with roasted broccoli and pesto
- Dinner: Turkey stir-fry with rice and bell peppers (reheat with soy sauce)
- Snack: Hard-boiled egg and cheese stick
Thursday
- Breakfast: Overnight oats with mixed fruit
- Lunch: Sweet potato stuffed with turkey, spinach, and shredded cheese
- Dinner: Chicken fried rice with broccoli and soy sauce (reheat in a skillet)
- Snack: Trail mix and an orange
Friday
- Breakfast: Overnight oats with yogurt and granola
- Lunch: Remaining chicken with rice and any leftover vegetables
- Dinner: Cook fresh or order out (this is your reward for a week of good eating)
- Snack: Hard-boiled egg and fruit
Reheating Tips for Best Results
How you reheat food matters almost as much as how you cook it. The wrong method turns a perfectly prepped meal into a rubbery disappointment.
Microwave reheating. Add a splash of water or broth to rice and grains before microwaving. This prevents them from drying out. Cover the container loosely to create steam. Heat in 90-second intervals, stirring between rounds for even temperature distribution.
Stovetop reheating. This is the best method for fried rice, stir-fries, and anything you want to re-crisp slightly. Heat a skillet over medium heat with a small amount of oil. Spread the food in a single layer and let it warm through for three to four minutes.
Oven reheating. Best for larger portions, casseroles, or anything with a crispy element you want to preserve. Preheat to 350°F, cover with foil to retain moisture, and heat for 15 to 20 minutes.
Do not reheat food more than once. Each reheating cycle brings food through the temperature danger zone (40°F to 140°F) where bacteria multiply rapidly. Heat only the portion you plan to eat.
⚠️ Important: Do not reheat food more than once. Each reheating cycle brings food through the temperature danger zone (40-140 degrees F) where bacteria multiply rapidly.
Food Safety Essentials
The two-hour rule. Never leave cooked food at room temperature for more than two hours. In hot weather above 90°F, that window drops to one hour. Cool food quickly by spreading it in a thin layer on a sheet pan before transferring to containers.
The four-day rule. Most cooked food stays safe in the refrigerator for three to four days. If you will not eat it by day four, freeze it on prep day instead.
Temperature matters. Keep your refrigerator at or below 40°F and your freezer at 0°F. An inexpensive thermometer inside each appliance helps you verify these temperatures are consistent.
When in doubt, throw it out. If food smells off, has changed color, or feels slimy, discard it. Food poisoning is never worth the cost of a meal.
Getting Started This Weekend
Meal prep is a skill that improves with practice. Your first session might feel slow and chaotic, and that is perfectly normal. By the third or fourth week, you will have a rhythm that makes the whole process feel almost automatic.
Start simple. Pick one protein, one grain, and two vegetables. Prep enough for five lunches. Once that feels easy, add breakfasts. Then add dinners. Before long, you will have a system that saves you hours every week and puts better food on your table every day.
References
- USDA: Food Safety and Inspection Service — Official guidelines on safe food handling, storage temperatures, and the two-hour rule.
- FDA: Refrigerator and Freezer Storage Chart — Detailed storage time recommendations for all food types.
- Wikipedia: Meal Preparation — Overview of meal prep as a cooking strategy and its growing popularity.