Painting Steps Overview
Painting a room is one of the most impactful home improvements you can make, and it is entirely within reach for a first-timer. The difference between an amateur paint job and a professional-looking finish comes down to preparation and technique, not talent. Professional painters spend more time prepping than they do actually rolling paint, and that discipline is what you should copy.
✨ Quick Summary: A professional-quality paint job is 60% preparation and 40% technique. This guide walks you through the full process — from choosing the right finish and calculating paint quantities to cutting in, rolling, and cleanup.
This guide walks you through the entire process from choosing paint and calculating quantities to the final cleanup, covering everything you need to produce a finish you will be proud of.
Choosing the Right Paint Finish
The finish (also called sheen) affects both the appearance and durability of the paint. Each finish has specific strengths that make it better suited to certain rooms and surfaces.
Paint Finish Comparison Table
| Finish | Sheen Level | Durability | Hides Imperfections | Best For | Washability |
|---|---|---|---|---|---|
| Flat/Matte | No sheen | Low | Excellent | Ceilings, low-traffic bedrooms | Poor |
| Eggshell | Slight sheen | Moderate | Good | Living rooms, dining rooms | Moderate |
| Satin | Soft sheen | Good | Moderate | Kitchens, hallways, kids’ rooms | Good |
| Semi-Gloss | Noticeable sheen | Very good | Low | Bathrooms, trim, doors | Very good |
| High Gloss | Mirror-like sheen | Excellent | None | Cabinets, furniture, accent details | Excellent |
📌 Key Point: The higher the sheen, the more durable and washable the finish, but the more it reveals wall imperfections. Low-traffic, low-moisture rooms do well with flat or eggshell. High-traffic and high-moisture areas need satin or semi-gloss.
Calculating How Much Paint to Buy
Use this formula to estimate paint quantities:
- Measure the length of each wall and add them together to get the room perimeter.
- Multiply the perimeter by the ceiling height to get total wall area in square feet.
- Subtract 20 square feet for each standard door and 15 square feet for each standard window.
- Divide the remaining square footage by 350 (the conservative coverage rate per gallon).
- Multiply by 2 (for two coats) to get the total gallons needed.
Example for a 12x12 room with 8-foot ceilings:
- Perimeter: 12 + 12 + 12 + 12 = 48 feet
- Wall area: 48 x 8 = 384 square feet
- Minus 1 door and 2 windows: 384 - 20 - 30 = 334 square feet
- Per coat: 334 / 350 = 0.95 gallons (round up to 1 gallon per coat)
- Two coats: 2 gallons total
Estimated cost for a 12x12 room: $150-$300 total (paint, supplies, tape, roller covers, brushes, drop cloths)
Estimated time: 6-10 hours spread over two days (includes drying time between coats)
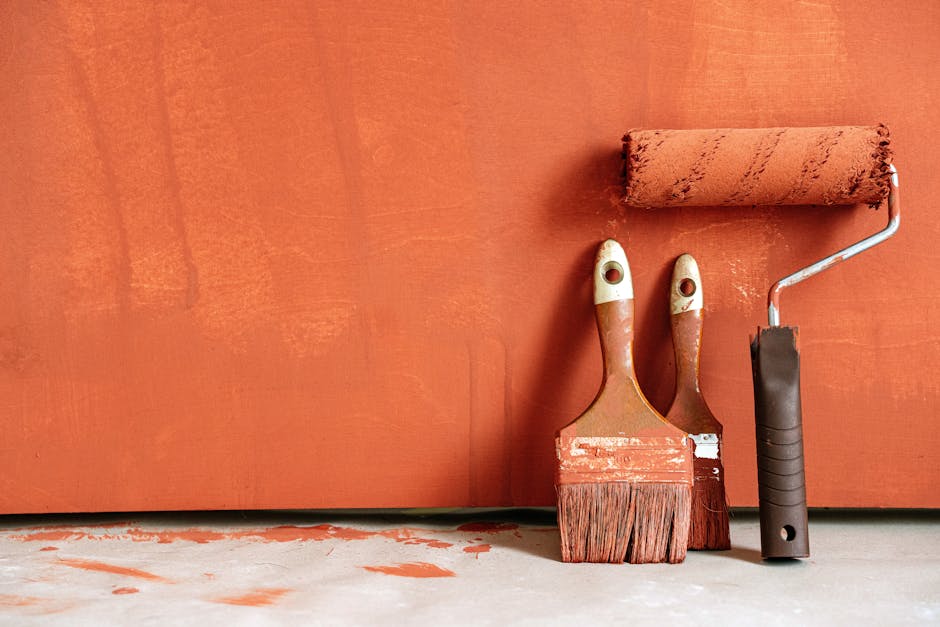
Tools and Supplies Needed
Gather everything before you start. Running to the store mid-project with wet paint drying on the walls creates problems.
- Paint roller frame (9-inch) and roller covers (3/8-inch nap for smooth walls, 1/2-inch for textured)
- 2-inch angled sash brush for cutting in
- Paint tray and tray liners
- Painter’s tape (the blue kind designed for clean removal)
- Canvas or plastic drop cloths
- 5-in-1 tool or putty knife
- Lightweight spackle and 120-grit sandpaper
- Damp rags or tack cloth
- Stepladder
- Paint can opener and stir sticks
- Primer (if needed)
Step 1: Prepare the Room
Preparation accounts for roughly 60 percent of the work and almost 100 percent of the quality.
Move and cover furniture. Shift all furniture to the center of the room and cover it with a plastic sheet or canvas drop cloth. Remove anything hanging on the walls. Take down curtain rods, outlet covers, switch plates, and light fixtures (or tape around fixtures you cannot remove).
Clean the walls. Dust along the top of baseboards and the ceiling line with a dry cloth. Wipe down walls with a damp sponge to remove fingerprints, grease, and grime, especially in kitchens. Let the walls dry completely.
Repair imperfections. Fill nail holes, dents, and small cracks with lightweight spackle using a putty knife. Apply spackle in thin layers, slightly overfilling the hole. Let it dry for 30 minutes, then sand flush with 120-grit sandpaper. Wipe away dust with a damp cloth.
Sand glossy surfaces. If the existing paint has a semi-gloss or gloss finish, lightly sand the entire wall with 150-grit sandpaper. This roughens the surface so the new paint adheres properly. Wipe off all sanding dust.
Step 2: Apply Primer (If Needed)
You need primer in these situations:
- Painting over a dark color with a lighter shade
- Covering stains from water damage, smoke, or marker
- Painting bare drywall, wood, or patched areas
- Switching from oil-based to latex paint
Apply primer with the same technique you will use for paint (cut in the edges, then roll the walls). Let primer dry for the time specified on the label before applying topcoat.
For color changes within a similar range, a quality paint-and-primer product eliminates this step entirely.
Step 3: Tape the Edges
Apply painter’s tape along the ceiling line, baseboards, window and door trim, and any other surface you want to protect.
Taping technique matters. Press the tape firmly along the edge using the flat side of a putty knife or credit card. This seals the tape edge and prevents paint from bleeding underneath. Run your finger along the entire length to check for bubbles or lifted edges.
💡 Pro Tip: Apply a thin line of the wall color (or base color) along the tape edge before applying the new color. This seals any micro-gaps in the tape, ensuring the color change line is razor sharp.
Step 4: Lay Drop Cloths
Canvas drop cloths stay in place better than plastic and absorb drips instead of letting them pool. Use canvas along the base of each wall and plastic sheeting to cover furniture and floors farther from the walls.
Tape the drop cloths to the baseboards to keep them from shifting while you work.
Step 5: Cut In the Edges
Cutting in means painting a 2-3 inch border around the ceiling line, corners, baseboards, and any areas the roller cannot reach.
Cutting in technique:
- Dip the angled brush about one-third into the paint. Tap it gently on the inside of the can to remove excess without wiping the bristles.
- Start about 1 inch away from the edge and paint a straight line toward it, pressing the brush to spread the bristles slightly.
- Draw the brush along the edge in smooth, steady strokes. The angled bristles naturally create a straight line when you maintain consistent pressure.
- Work in 3-foot sections, keeping a wet edge to avoid lap marks.
- Cut in the entire room before rolling so the brush strokes blend seamlessly with the rolled sections.
Pro tip: Cut in one wall at a time, then roll that wall before the cut line dries. This blending technique produces the most uniform finish.
Step 6: Roll the Walls
Rolling is faster than brushing and produces a smoother, more even finish on large surfaces.
Rolling technique (the W pattern):
- Load the roller evenly by rolling it through the paint tray several times. The roller should be fully saturated but not dripping.
- Start near the top of the wall and roll a large W or M pattern across a 3-4 foot section. This distributes paint across the area.
- Without reloading, roll over the same section in straight, overlapping vertical strokes from top to bottom to even out the paint.
- Reload and move to the next section, overlapping the previous section by about 2 inches to blend the edges.
- Maintain a wet edge at all times. If paint dries before you blend into the next section, you will see a visible line called a lap mark.
- Apply consistent, moderate pressure. Pressing too hard squeezes paint to the edges of the roller and creates tracks.
Step 7: Apply the Second Coat
Allow the first coat to dry for the time specified on the paint can, usually 2-4 hours for latex paint. The wall should feel completely dry to the touch with no tackiness.
Repeat the cutting in and rolling process for the second coat. Two coats provide uniform color coverage, consistent sheen, and better durability. Skipping the second coat almost always shows, especially with lighter colors over darker backgrounds.
Step 8: Remove Tape and Clean Up
Remove tape at the right time. Pull the tape while the final coat is still slightly tacky (about 30-60 minutes after the last coat). Pull at a 45-degree angle away from the painted surface in a slow, steady motion. If you wait until the paint fully cures, it may peel along with the tape.
Touch up any imperfections. Use the angled brush to carefully touch up any spots where paint bled under the tape or where the roller missed. Apply paint sparingly and feather the edges.
Clean your tools. Latex paint cleans up with soap and warm water. Rinse rollers and brushes thoroughly until the water runs clear. Reshape brush bristles and hang them to dry or wrap in paper to maintain their shape. Store leftover paint in a sealed can at room temperature for future touch-ups. Label the can with the room name and date.
Common Mistakes and How to Avoid Them
Drips and runs. Caused by overloading the brush or roller. Use less paint per stroke and maintain awareness of your work as you go. If you spot a drip, smooth it out immediately with a light roller or brush stroke before it dries.
Lap marks. Visible lines caused by rolling over paint that has already started to dry. Always maintain a wet edge by working quickly and in manageable sections. In hot or dry conditions, work even faster or use a paint additive (extender) that slows drying.
Missed spots. Common in corners, along trim, and behind fixtures. After each wall, step back and examine it from multiple angles. A bright work light held at an angle to the wall reveals thin spots and misses.
Paint on the ceiling. Caused by rolling too close to the ceiling line. Cut in generously with the brush so you do not need to bring the roller within 2 inches of the ceiling. A steady hand with the brush prevents this entirely.
Roller marks and texture. Caused by using the wrong roller nap thickness, applying uneven pressure, or letting paint dry on the roller between passes. Use the correct nap size for your wall texture and reload frequently.
Professional Shortcuts Worth Knowing
Box your paint. If you are using more than one gallon, pour all cans into a 5-gallon bucket and mix thoroughly. This eliminates slight color variations between cans that become visible when they dry.
Start with the ceiling. If you are painting the ceiling too, do it first. Drips and overspray from the ceiling will be covered when you paint the walls.
Use an extension pole. An extension pole on your roller lets you paint from floor to ceiling without a ladder. It also gives you better leverage and more consistent pressure, which reduces roller marks.
Paint in the right order. Ceiling first, then walls, then trim and doors. This sequence lets you be slightly messy at each stage because the next step covers any overspray.
⚠️ Important: If your home was built before 1978, test for lead paint before sanding or scraping. Lead paint dust is a serious health hazard, especially for children. Home test kits are available at hardware stores, or hire a certified inspector.
The payoff for careful preparation and patient technique is a room that looks like a professional crew painted it. Take your time, follow the steps, and enjoy the transformation.